
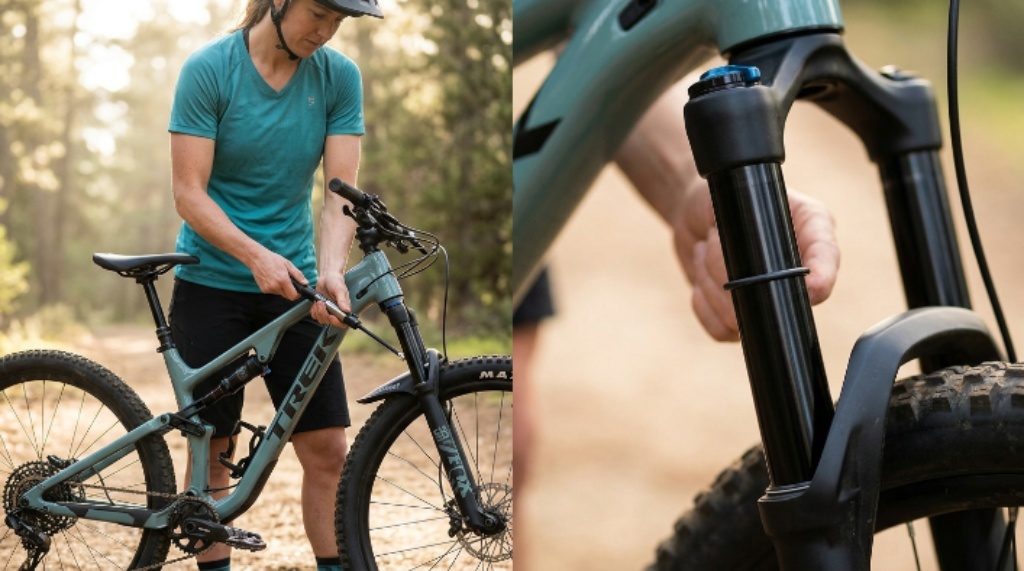
Setting up mountain bike suspension starts with correct air pressure, sag, and rebound. For most trail bikes, riders often begin around 15% to 25% fork sag and 25% to 30% rear sag. However, your suspension manufacturer’s pressure chart should always provide the first baseline.
A good suspension setup does more than make your bike feel softer. It helps the tires maintain contact, controls chassis movement, and reduces unnecessary rider fatigue. Modern suspension systems also respond differently to rider weight, terrain, riding style, and setup changes. Therefore, learning a simple adjustment process gives you much better results than copying another rider’s settings.
Why Proper Suspension Setup Matters
Your suspension controls how the bike reacts when the trail changes beneath you. Correct settings help the wheels follow rocks, roots, holes, drops, and braking bumps.
When the suspension works properly, the bike feels predictable instead of nervous. You can also maintain better traction while climbing, cornering, braking, and descending.
However, comfort does not simply mean making everything softer. Excessively soft suspension can reduce support and cause frequent bottoming.
Likewise, excessive firmness can make rough trails feel harsh and reduce tire contact. The goal involves finding a balanced setup that supports your riding without fighting the terrain.
Know the Three Main Suspension Settings
Before touching any adjustment dial, understand what each setting controls. This prevents random changes and makes troubleshooting much easier.
Sag Controls Your Starting Position
Sag describes how much the suspension compresses under your weight. It establishes the suspension’s starting position before you encounter a bump.
More sag creates a softer starting position and can improve small bump sensitivity. Less sag creates more support and can help prevent excessive compression.
Your riding position also affects sag measurements. Therefore, wear your normal riding gear and stand or sit naturally during measurement.
Rebound Controls Return Speed
Rebound controls how quickly your suspension extends after compression. The correct setting lets the suspension recover without throwing the bike upward.
Too much rebound damping makes the suspension return slowly. Too little rebound damping makes it return too quickly.
Most adjustment dials use symbols that indicate slower and faster settings. The turtle usually represents slower rebound, while another symbol represents faster rebound.
Compression Controls Movement Under Load
Compression damping controls how easily the suspension compresses during rider inputs and impacts. Some components offer basic compression adjustment, while advanced systems provide separate high and low speed controls.
Beginners should avoid changing several compression settings immediately. First establish correct air pressure, sag, and rebound.
That approach creates a stable baseline before you experiment with more advanced adjustments.
What You Need Before Starting
You do not need a workshop full of specialist equipment. A few basic tools can handle most air suspension setup tasks.
Prepare these items:
- A suspension shock pump with a pressure gauge
• A clean measuring ruler
• Your normal riding shoes and protective equipment
• Your usual riding pack and carried equipment
• A notebook or phone for recording settings
• A safe, repeatable trail for testing
Never use a standard floor pump for suspension air chambers. Suspension systems require controlled pressure adjustments through a proper shock pump.
Also check your fork and shock manufacturer’s recommended pressure range. Never exceed the maximum pressure printed or specified for your component.
Step 1: Record Your Current Settings
Before changing anything, record every current setting. Count rebound clicks from the fully closed position if your manufacturer uses that method.
Also record your current air pressure and compression positions. Take a quick photo of each adjustment dial if necessary.
This simple step gives you a reliable return point. It also prevents confusion when several adjustments start changing the bike’s behavior.
Step 2: Set the Correct Air Pressure
Air pressure determines the spring rate of an air suspension system. Your rider weight, bike design, suspension model, and riding style all influence the correct pressure.
Start with the manufacturer’s recommended pressure rather than guessing from another bike. Modern suspension manufacturers commonly provide model specific starting settings.
Equalize the Air Chambers
Many modern air forks and shocks contain positive and negative air chambers. These chambers need proper pressure balance before you measure final sag.
For an air fork, slowly compress the fork several times through part of its travel. Then check the pressure again with your shock pump.
For an air shock, cycle the suspension gently several times before finalizing pressure. This allows internal air pressure to equalize properly.
The exact procedure varies between suspension designs. Always follow your component’s specific setup instructions when they differ.
Step 3: Measure Fork Sag
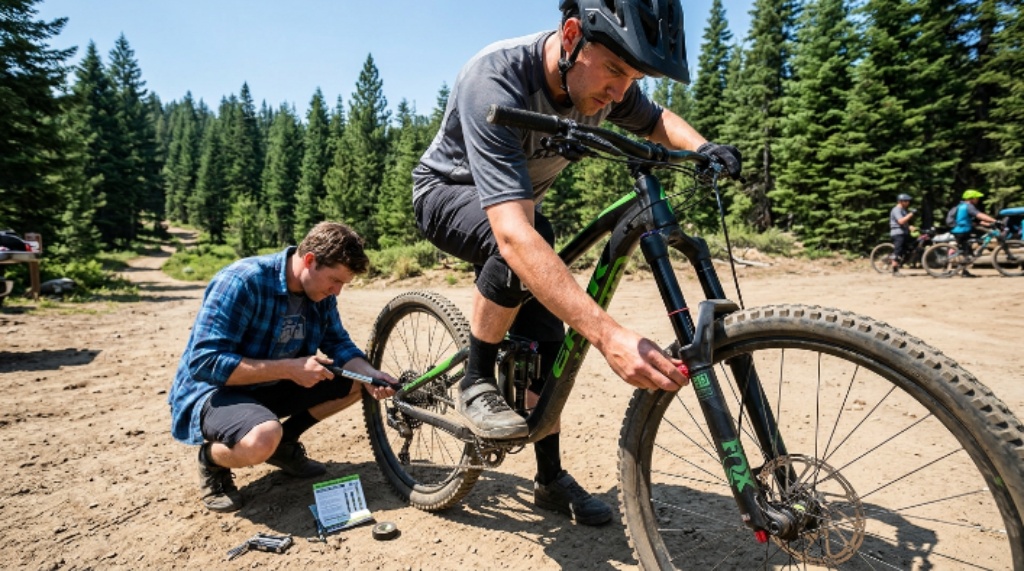
Start by moving the fork’s rubber travel indicator against the seal. Then put on your normal riding equipment.
Stand on the pedals in your normal riding position. Keep your body centered and avoid deliberately pushing downward on the handlebar.
Carefully step off without compressing the fork further. Measure how far the indicator moved along the stanchion.
Use this formula:
Sag percentage = compressed distance ÷ available travel × 100
For example, a 120 millimeter fork with 20 millimeters of sag has approximately 17% sag.
Many trail riders begin somewhere around 15% to 25% fork sag. However, your manufacturer’s recommendation and suspension design should take priority.
Adjust Fork Pressure Gradually
If the fork shows excessive sag, add a small amount of air. If the fork shows insufficient sag, remove a small amount of air.
Make small pressure changes instead of making large adjustments. Then repeat the measurement using exactly the same riding position.
Consistency matters more than chasing a specific number. A repeatable measurement produces a much more useful setup.
Step 4: Measure Rear Shock Sag
Rear shock sag requires slightly more attention because the shock’s stroke does not equal rear wheel travel.
First, set the shock’s rubber indicator against its seal. Sit or stand naturally according to your suspension manufacturer’s recommended measurement method.
Keep your feet positioned normally and avoid bouncing the suspension. Then carefully dismount and check the indicator movement.
Many trail bikes commonly start near 25% to 30% rear sag. Some bikes and riding disciplines use different targets.
For example, aggressive riding may benefit from more support than a comfort focused setup. Your frame manufacturer’s recommended range should remain your primary reference.
Step 5: Set Rebound Correctly
Once sag feels correct, move to rebound. This adjustment determines how quickly the suspension returns after compression.
Start from the manufacturer’s recommended rebound setting. Then test the bike on familiar terrain containing repeated bumps.
If the suspension returns too quickly, slow the rebound slightly. If it returns too slowly, increase the rebound speed slightly.
Signs of Rebound That Feels Too Fast
Watch for these symptoms:
- The bike feels springy after impacts
• The front end feels nervous after repeated bumps
• The rear wheel feels like it kicks upward
• The bike loses stability after successive impacts
If these symptoms appear, add rebound damping gradually. One or two clicks can make a noticeable difference.
Signs of Rebound That Feels Too Slow
Slow rebound creates a different problem. The suspension may fail to recover fully before the next impact arrives.
Look for these signs:
- The suspension feels increasingly compressed
• Repeated bumps make the bike feel lower
• Traction becomes inconsistent
• The bike feels sluggish over rough sections
When this happens, reduce rebound damping gradually. Test each change before making another adjustment.
Step 6: Balance Front and Rear Suspension
Suspension balance matters as much as individual settings. A correctly tuned fork can still feel poor when the rear shock behaves differently.
Imagine riding across repeated rocks. The fork should recover at a controlled rate while the rear suspension follows naturally.
If the rear feels much faster than the front, the bike can feel unsettled. Conversely, excessive rear damping can make the bike feel stuck and heavy.
Make changes in small increments. Always test the front and rear together after adjusting either component.
Step 7: Test Comfort Without Chasing Softness
Comfort comes from controlled suspension movement, not maximum softness. A soft setup can still feel harsh when rebound or compression settings remain inappropriate.
Ride a familiar trail at a moderate pace. Pay attention to your hands, feet, hips, and overall body movement.
Notice how the bike responds to small bumps first. Then evaluate larger impacts and repeated rough sections.
Ask yourself:
- Does the front tire maintain contact?
• Does the rear wheel follow rough terrain?
• Does the bike stay balanced while braking?
• Does the suspension use most available travel?
• Does your body feel unnecessarily fatigued?
These observations provide more useful information than simply saying the suspension feels good.
How To Use the Travel Indicator
The rubber indicator on your fork or shock provides valuable information after a ride. It shows how much suspension travel you used.
Before riding, place the indicator against the seal. After riding, check its final position.
Using most available travel during demanding riding generally indicates useful suspension movement. Occasional full travel during major impacts can happen during normal riding.
However, frequent harsh bottoming suggests insufficient support. That problem may involve air pressure, progression, compression settings, or riding conditions.
Do not immediately add large amounts of air. First determine why the suspension repeatedly reaches full travel.
Common Beginner Suspension Mistakes
New riders often change several settings at once. That approach makes it almost impossible to identify which adjustment created an improvement.
Another common mistake involves copying another rider’s pressure settings. Two riders can have different weights, riding styles, bikes, tires, and terrain.
Some riders also assume faster rebound always creates more comfort. In reality, excessive rebound speed can make the bike feel unstable.
Likewise, extremely slow rebound can make the suspension pack down through repeated impacts. The correct setting provides controlled recovery instead of maximum speed or maximum damping.
What To Do When the Bike Feels Too Harsh
A harsh ride does not automatically mean you need less air pressure. Several factors can create similar sensations.
Check these areas in order:
- Confirm your sag measurement.
- Check your rebound setting.
- Confirm your tire pressure.
- Check compression damping.
- Inspect suspension seals and service condition.
- Test the bike on a different section of trail.
Tire pressure can strongly influence perceived suspension comfort. Therefore, avoid changing suspension settings while ignoring tire setup.
If the suspension still feels unusually harsh, inspect the fork or shock for service issues. Dry seals, contaminated oil, or mechanical problems can affect performance.
What To Do When the Bike Feels Too Soft
A soft bike may lack support during braking, climbing, or aggressive cornering. However, adding air immediately may not solve every problem.
First check whether you actually have excessive sag. Then examine your rebound setting and compression damping.
If the suspension reaches full travel frequently, additional spring support may help. Some air systems can also use volume spacers to alter progression.
Do not install spacers simply because the suspension feels soft. Confirm that your component supports them and follow the manufacturer’s instructions.
How Terrain Changes Your Ideal Setup
There is no single suspension setting that works perfectly everywhere. Trail conditions can change what feels comfortable and controlled.
Smooth cross country terrain may reward a firmer, efficient setup. Rocky descents may benefit from additional sensitivity and controlled travel.
Wet trails can also change your priorities because traction becomes more important. Likewise, bike park riding can demand more support for repeated impacts.
Therefore, treat your baseline settings as a starting point. Adjust from there according to the terrain you actually ride.
A Simple Suspension Tuning Method
The easiest method involves changing one variable at a time. This approach keeps your testing structured and prevents confusion.
Use this sequence:
- Set manufacturer recommended air pressure.
- Equalize the air chambers properly.
- Measure and adjust fork sag.
- Measure and adjust rear shock sag.
- Set manufacturer recommended rebound.
- Ride a familiar trail.
- Change rebound one or two clicks if necessary.
- Test again.
- Adjust compression only after establishing the baseline.
- Record the final settings.
Give yourself enough riding time between adjustments. A five minute test cannot always reveal how suspension behaves across an entire trail.
When You Should Stop Adjusting Yourself
Basic suspension setup suits most riders, but some problems require professional attention. Mechanical damage, unusual noises, oil leakage, or persistent poor performance deserve inspection.
You should also seek professional help when your suspension needs internal service. Air pressure adjustments cannot correct worn seals, damaged shafts, contaminated oil, or internal damper problems.
A qualified suspension technician can also help when you need advanced tuning. This becomes particularly useful for aggressive riders who need precise high speed and low speed damping control.
Final Suspension Setup Checklist
Before your next ride, verify these points:
- Air pressure matches your component’s recommended starting range
• Fork sag matches your intended riding feel
• Rear shock sag suits your frame and riding style
• Rebound allows controlled recovery
• Compression settings remain reasonable
• Travel indicators move freely
• Suspension components show no obvious damage
• You recorded your final settings
Once everything checks out, ride the same familiar trail again. Use your body and the bike’s behavior as your primary feedback.
Remember that suspension setup remains personal. The best settings give you confidence, traction, support, and comfort without making the bike feel uncontrolled.
Frequently Asked Questions
What is the best sag for a mountain bike?
A common starting point is about 15% to 25% for forks and 25% to 30% for rear shocks.
Should mountain bike rebound be fast or slow?
Rebound should return the suspension quickly enough for recovery without creating a springy or unstable feeling.
How often should I adjust mountain bike suspension?
Check your settings whenever your riding conditions, equipment load, suspension components, or riding style changes significantly.
Why does my mountain bike suspension feel too hard?
Incorrect air pressure, rebound, compression, tire pressure, or suspension service condition can make a bike feel excessively harsh.
Should I set sag while wearing riding gear?
Yes, measure sag while wearing your normal riding equipment because your complete riding weight affects suspension position.
Conclusion
Learning how to set up mountain bike suspension does not require advanced mechanical knowledge. Start with manufacturer recommended air pressure, establish consistent sag, then tune rebound through controlled trail testing.
Most importantly, change one setting at a time and record what happens. That simple habit turns suspension setup from guesswork into a repeatable process.
Take your bike onto a familiar trail, test your baseline settings, and make small adjustments until the bike feels balanced. Once you find a setup that works, record it so you can quickly recreate your preferred suspension feel.