
Kitchen noise can disrupt the peace of your home. Buzzing, humming, and vibrating sounds from under-cabinet fixtures create unnecessary stress during meal preparation. Fortunately, these issues are solvable with the right approach. The Funky Kitchen offers practical solutions for homeowners seeking quieter, more enjoyable cooking spaces.
Under-cabinet lighting and appliances often produce unwanted resonance. This occurs when electrical components vibrate against metal or wood surfaces. The good news is that most resonance problems can be fixed without professional help. Simple adjustments and affordable materials make a significant difference in reducing annoying sounds.
Understanding Under-Cabinet Resonance
Resonance happens when vibrations amplify through contact with solid surfaces. Under-cabinet lights, range hoods, and microwaves all contain transformers and motors. These components generate vibrations during operation. When mounted directly against cabinets, the vibrations transfer and magnify.
The cabinet structure acts as a soundboard, similar to a musical instrument. Wood and metal surfaces amplify the original vibration, creating that persistent hum. Additionally, loose mounting hardware worsens the problem. Even small gaps allow components to rattle against their housings.
Different fixtures produce different noise patterns. LED drivers emit high-pitched whines. Range hood motors create low-frequency rumbles. Microwave transformers buzz at varying intensities. Understanding your specific noise source helps you choose the right fix.
Quick Fixes for Immediate Relief
Start with the simplest solutions first. Check all mounting screws and tighten any loose hardware. Loose screws allow excessive movement and vibration. Use a screwdriver to ensure everything sits firmly in place.
Next, inspect the fixture itself. Look for loose covers, panels, or trim pieces. These components often rattle when not properly secured. Tighten or replace any damaged parts you discover during inspection.
Consider adding rubber washers between the fixture and cabinet surface. These small items cost just a few dollars at hardware stores. However, they provide excellent vibration dampening. Place washers under each mounting point for maximum effect.
Installing Vibration-Dampening Materials
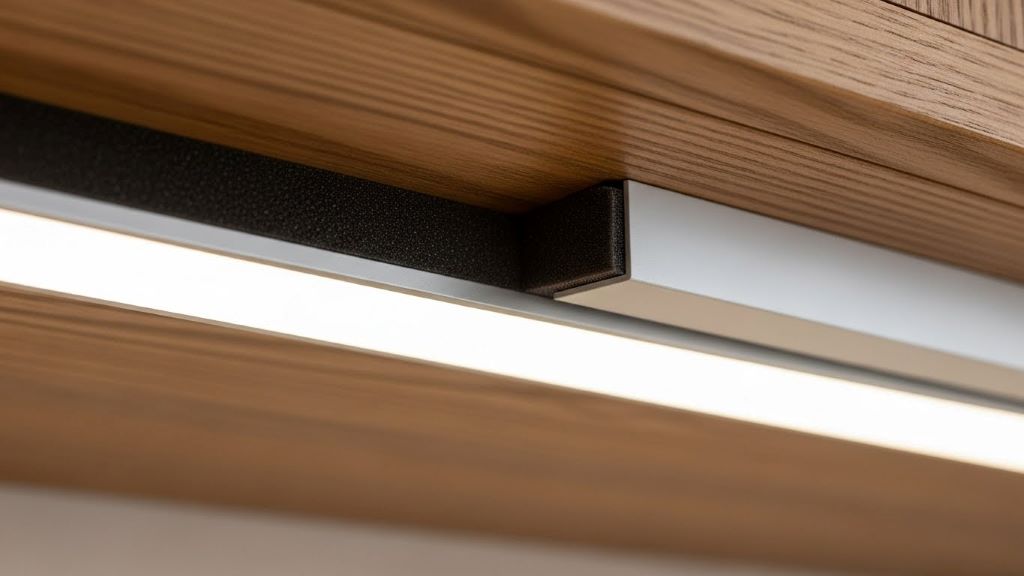
Foam tape offers an easy and effective solution. Apply self-adhesive foam strips along the back of the fixture before mounting. This creates a buffer zone that absorbs vibrations. The foam prevents direct contact between metal and wood surfaces.
Rubber pads work similarly but provide more cushioning. Cut rubber shelf liner to size and place it behind fixtures. This method works especially well for heavier appliances like microwaves. The rubber absorbs vibrations while supporting the weight of the appliance.
Cork sheets provide another natural dampening option. Cork compresses slightly under pressure, which helps isolate vibrations. Cut cork to match your fixture’s footprint. Then, attach it using appropriate adhesive. This solution works particularly well for how to reduce noise from kitchen environments where multiple noise sources exist.
Addressing Electrical Transformer Buzz
LED under-cabinet lights often buzz due to incompatible dimmers. Standard dimmers may not work properly with LED technology. Therefore, switch to dimmers specifically designed for LED fixtures. This simple change eliminates most buzzing issues.
Check your bulb compatibility as well. Not all LED bulbs work with all fixtures. Mismatched components create electrical interference and noise. Replace bulbs with manufacturer-recommended options for best results.
Sometimes the transformer itself causes problems. Lower-quality transformers generate more noise than premium models. Consider upgrading to a better-quality driver or transformer. Spending a bit more upfront saves frustration later.
Range Hood Noise Reduction
Range hoods create noise through both motor vibration and airflow. Start by examining the mounting brackets. Loose brackets allow the entire unit to vibrate excessively. Tighten all connections and add rubber washers for isolation.
The ductwork also contributes to noise levels. Loose duct connections rattle when the fan operates. Seal all joints with appropriate duct tape or mastic. This prevents both noise and air leakage.
Furthermore, check the fan blade assembly. Accumulated grease makes blades unbalanced, causing vibration. Clean the blades thoroughly and ensure they spin freely. Replace damaged or bent blades promptly.

Microwave Installation Improvements
Built-in microwaves require careful installation to minimize noise. The mounting bracket must fit snugly against both the cabinet and appliance. Any gaps create opportunities for vibration and noise. Use shims to fill spaces and ensure tight contact.
Add vibration-dampening pads at all contact points. Place pads where the microwave touches the cabinet or mounting bracket. This small step makes a noticeable difference in operation noise.
Consider the microwave’s internal fan as well. Over time, fan bearings wear and create grinding sounds. If dampening efforts fail, the appliance itself may need service or replacement. According to Consumer Reports, most microwaves last about nine years before requiring replacement.
Professional-Grade Solutions
For persistent problems, professional acoustic treatments offer superior results. Mass-loaded vinyl provides excellent sound blocking. Install sheets of this material inside cabinet walls near noisy fixtures. The added mass prevents sound transmission.
Acoustic caulk seals gaps that allow sound to escape. Apply this specialized sealant around fixture edges and mounting holes. Unlike regular caulk, acoustic versions remain flexible and maintain their sound-blocking properties.
Green Glue compound works between layers of material to dampen vibrations. Sandwich this compound between existing cabinet surfaces and additional panels. The compound converts vibrational energy into harmless heat.
Preventive Maintenance Tips
Regular cleaning prevents many noise issues. Dust and debris accumulate on fixtures over time. This buildup can cause imbalance and vibration. Wipe down all under-cabinet components monthly.
Inspect mounting hardware quarterly. Screws naturally loosen due to vibration and temperature changes. A quick check prevents small issues from becoming major annoyances. Keep appropriate tools handy for quick adjustments.
Additionally, listen for changes in noise patterns. New sounds often indicate developing problems. Address unusual noises promptly before they worsen. Early intervention saves both time and money.
Budget-Friendly Options
You do not need expensive solutions for effective noise reduction. Dollar stores carry foam tape and rubber shelf liner. These materials perform nearly as well as premium alternatives. Start with budget options before investing in costly treatments.
Recycled materials also work well for dampening. Old mouse pads, yoga mats, or rubber floor tiles all absorb vibrations effectively. Cut them to size and place them strategically. This approach costs nothing while solving your noise problem.
DIY acoustic panels made from moving blankets provide additional sound absorption. Hang these inside cabinets near problematic fixtures. The thick fabric traps sound waves and reduces echo.
When to Call a Professional
Some situations require expert help. Electrical issues causing transformer buzz may indicate wiring problems. Do not attempt electrical repairs without proper training. Instead, hire a licensed electrician for safety.
Structural cabinet issues also warrant professional assessment. Warped or damaged cabinets cannot properly support fixtures. A carpenter can evaluate and repair cabinet problems. This ensures safe, secure mounting for all components.
Finally, persistent noise despite all efforts suggests appliance defects. Contact the manufacturer or an authorized repair service. Warranty coverage may apply to defective components.
Conclusion
Under-cabinet resonance noise disrupts kitchen comfort but remains fixable through various methods. Simple tightening of hardware solves many problems immediately. Vibration-dampening materials provide affordable, effective solutions for most situations. Understanding your specific noise source guides you toward the right fix.
Regular maintenance prevents future noise issues. Quick inspections and cleaning keep fixtures operating quietly. Budget-friendly options work well for most homeowners. However, do not hesitate to seek professional help for electrical or structural concerns. A quiet kitchen enhances your home’s enjoyment and value.
Frequently Asked Questions
Why does my under-cabinet lighting buzz when dimmed?
Buzzing occurs when standard dimmers interact with LED lights. LED fixtures require specialized dimmers designed for their technology. Replace your old dimmer with an LED-compatible model to eliminate the buzzing sound.
Can I fix range hood vibration without replacing the unit?
Yes, most range hood vibration issues stem from loose mounting or ductwork. Tighten all brackets, add rubber washers, and secure duct connections. These steps usually resolve vibration problems without requiring replacement.
What is the best material for dampening under-cabinet noise?
Foam tape and rubber pads both work excellently for most applications. Foam tape costs less and installs easily. Rubber pads provide more cushioning for heavier appliances. Choose based on your specific fixture and budget.
How often should I check under-cabinet fixture mounting?
Inspect mounting hardware every three months. Vibration and temperature changes naturally loosen screws over time. Regular checks prevent small issues from developing into major noise problems.
Will adding dampening materials damage my cabinets?
No, properly installed dampening materials protect cabinets from damage. Adhesive foam and rubber pads attach safely to most surfaces. Remove them carefully if needed, using appropriate solvents for any residual adhesive.
Related Topics:
Step-by-Step Guide to Organizing and Cleaning Kitchen
The Eames Lounge Chair: An Icon of Mid-Century Modern Design


