
Smart garage door technology has transformed how homeowners manage their property security and convenience. According to experts at Sherwood Blog, hub-free systems offer a straightforward approach to home automation without requiring additional equipment. These devices connect directly to your home WiFi network, eliminating the need for expensive hubs or bridges.
Modern smart garage openers provide remote access, real-time notifications, and seamless integration with voice assistants. Additionally, they offer enhanced security features that traditional openers simply cannot match. This technology allows you to monitor and control your garage door from anywhere in the world using just your smartphone.
Understanding Hub-Free Smart Garage Openers
Hub-free smart garage openers differ significantly from traditional smart home devices. They communicate directly with your WiFi router, which simplifies installation and reduces costs. Moreover, this direct connection often results in faster response times and fewer potential points of failure.
When you learn how to hookup smart garage opener to garage door, you’ll discover the process is remarkably straightforward. Most systems work with existing garage door openers, making them an affordable upgrade option. Furthermore, these devices typically require only basic tools and minimal technical knowledge.
The beauty of hub-free systems lies in their simplicity. You don’t need to purchase additional equipment or manage multiple device ecosystems. Instead, everything operates through a single app on your smartphone. This streamlined approach appeals to both tech-savvy users and those new to smart home technology.
Preparing Your Garage for Installation
Before beginning installation, assess your garage’s WiFi signal strength. Walk into your garage with your smartphone and check the WiFi bars. A weak signal can cause connectivity issues and unreliable operation. Therefore, you may need to install a WiFi extender to ensure stable communication.
Next, examine your existing garage door opener. Most modern openers manufactured after 1993 are compatible with smart garage controllers. However, some older models may require additional adapters or workarounds. Check the manufacturer’s compatibility list before purchasing any equipment.
Clear the area around your garage door opener. You’ll need easy access to the control panel and enough space to work comfortably. Additionally, gather the necessary tools, which typically include a screwdriver, wire strippers, and possibly a ladder. Having everything ready beforehand makes the installation process smoother and faster.
Connecting to Your WiFi Network
The WiFi setup process represents the most critical step in configuration. Start by downloading the manufacturer’s app to your smartphone. Most apps are available for both iOS and Android devices. Create an account if required, then follow the in-app setup wizard.
Place your smart garage opener near your router during initial setup. This proximity ensures a strong signal during the pairing process. The device will typically flash an LED indicator when ready to connect. Enter your WiFi network name and password carefully, as typos are a common source of frustration.
Once connected, test the signal strength from your garage location. Many apps display connection quality in real-time. If the signal appears weak, consider repositioning your router or adding a WiFi extender. Remember, a stable connection is essential for reliable operation and timely notifications.
Wiring and Physical Installation
Turn off power to your garage door opener before beginning any electrical work. Safety should always be your top priority. Locate the control terminals on your existing opener, which are usually labeled clearly. These terminals typically include connections for door control and ground wires.
Connect the smart opener’s wires to the appropriate terminals. Most devices use color-coded wires to simplify this process. Red wires typically connect to the positive terminal, while white wires connect to the negative. However, always consult your specific device’s manual for accurate wiring information.
Secure the smart opener unit in a convenient location. Many users mount them on the wall near the existing opener for easy access. Use the provided mounting hardware and ensure the unit is level. Additionally, make sure all wire connections are tight and properly insulated to prevent shorts.
Configuring Advanced Features
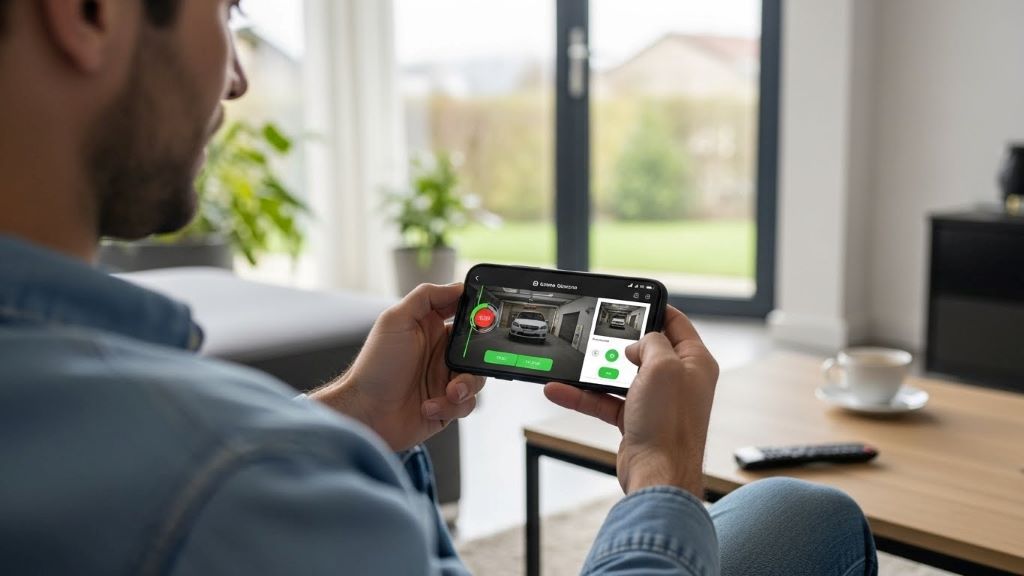
After basic installation, explore your smart opener’s advanced features. Set up geofencing to receive automatic notifications when you arrive or leave home. This feature uses your smartphone’s location to trigger actions. For instance, you might want an alert if you leave with the garage door open.
Configure user access permissions for family members and trusted individuals. Most systems allow you to create multiple user profiles with varying access levels. You can grant temporary access to delivery drivers or service personnel. Furthermore, you can set specific times when each user can operate the door.
Integrate your smart garage opener with voice assistants like Amazon Alexa or Google Assistant. Voice control adds another layer of convenience to your daily routine. Simply say “Close the garage door” to secure your home without lifting a finger. According to Consumer Reports, voice integration is becoming increasingly popular among smart home users.
Optimizing Performance and Reliability
Regular maintenance ensures your smart garage opener continues functioning properly. Check WiFi connectivity monthly and update the device firmware whenever new versions become available. Manufacturers often release updates that improve security and add new features. Therefore, keeping your device current is essential.
Test all sensors and safety features regularly. Walk through the door’s path while closing to verify the safety sensors work correctly. Most systems will automatically reverse if they detect an obstruction. Additionally, test the manual release mechanism to ensure it functions in case of power outages.
Monitor battery levels in your smart opener and any connected sensors. Many devices send low-battery alerts through their apps. Replace batteries promptly to avoid unexpected failures. Keep spare batteries on hand for quick replacements when needed.
Troubleshooting Common Issues
Connection problems represent the most frequent complaint among users. If your device disconnects frequently, check for interference from other electronics. Microwaves, cordless phones, and baby monitors can all disrupt WiFi signals. Moving these devices or switching WiFi channels often resolves connectivity issues.
Delayed responses might indicate network congestion or weak signal strength. Try reducing the number of devices on your network or upgrading your internet plan. Additionally, ensure your router firmware is up to date, as outdated routers can cause various problems.
If the door fails to respond to commands, verify that the wiring connections remain secure. Vibrations from door operation can sometimes loosen connections over time. Tighten any loose wires and ensure all electrical connections are clean and corrosion-free.
Security Best Practices
Protect your smart garage opener with a strong, unique password. Avoid using default passwords or easy-to-guess combinations. Enable two-factor authentication if your system supports it. This extra security layer helps prevent unauthorized access to your garage.
Review access logs regularly to monitor who operates your garage door. Most apps maintain detailed activity histories showing each time the door opens or closes. Look for any suspicious activity or access attempts. Furthermore, revoke access immediately for any users who no longer need it.
Keep your smartphone secure since it controls your garage access. Use biometric authentication or strong PIN codes. Additionally, enable remote wipe capabilities in case your phone is lost or stolen. These precautions protect both your physical home and digital security.
Integration with Smart Home Ecosystems
Many hub-free garage openers work seamlessly with broader smart home systems. Create automation routines that connect your garage door to other devices. For example, you might want your lights to turn on automatically when the garage door opens after sunset.
Link your smart opener with security cameras for enhanced monitoring. Receive video clips whenever the garage door activates. This integration provides visual confirmation of who enters and exits your property. Moreover, recorded footage can prove valuable if security incidents occur.
Connect your garage opener to smart locks and alarm systems. Coordinated security creates a comprehensive protection network for your home. When you arrive home, your garage door, house door, and alarm system can all respond automatically. This seamless integration represents the future of home automation.
Conclusion
Hub-free smart garage openers offer an accessible entry point into home automation. They provide convenience, security, and peace of mind without requiring extensive technical knowledge or expensive equipment. The installation process is straightforward, and the ongoing benefits make them a worthwhile investment.
By following proper configuration tips and maintaining your system regularly, you’ll enjoy years of reliable operation. These devices transform your daily routine and enhance your home’s security profile. Additionally, they increase property value and appeal to tech-conscious buyers.
Whether you’re new to smart home technology or expanding an existing system, hub-free garage openers deliver exceptional value. They simplify access control, provide real-time monitoring, and integrate smoothly with other smart devices. Take the time to configure your system properly, and you’ll reap the rewards for years to come.
Frequently Asked Questions
Can hub-free smart garage openers work without internet? Most hub-free smart garage openers require an internet connection for remote access and smartphone control. However, many models retain basic functionality during internet outages. You can still use the physical wall button and remote controls. Some systems store recent commands locally and sync when connectivity returns.
How much does it cost to install a hub-free smart garage opener? Hub-free smart garage opener controllers typically cost between $30 and $100, depending on features. Installation is usually a DIY project requiring no professional help. If you prefer professional installation, expect to pay an additional $75 to $150. Overall costs remain significantly lower than full garage door opener replacements.
Will my smart garage opener work with multiple doors? Many hub-free systems support multiple garage doors through a single app. Some controllers can manage up to three doors simultaneously. You’ll need separate control units for each door, but they all connect to the same WiFi network. Check your specific model’s capabilities before purchasing.
How secure are hub-free smart garage openers? Modern hub-free garage openers use bank-level encryption to protect your data and commands. They employ secure cloud connections and regular security updates. Additionally, features like activity logs and user access controls enhance security. These systems are generally more secure than traditional garage door openers with outdated rolling code technology.
Do smart garage openers drain WiFi bandwidth? Smart garage openers use minimal bandwidth, typically sending only small data packets during operation. They won’t noticeably impact your internet speed or cause streaming issues. The devices remain in low-power standby mode most of the time. They only transmit data when sending commands or status updates.
Related Topics:
Small Electric Fireplace Heaters for Cozy Living Spaces
What Happens If You Leave Citristrip On Too Long: A Complete Guide to Paint Stripper Safety and Best Practices