

Dealing with a loss of suction in your Dyson vacuum can be frustrating. Often, the culprit is a hidden blockage lurking inside the wand. When your vacuum starts losing power, it’s time to investigate. Fortunately, clearing these obstructions is straightforward once you know where to look. Whether you’re a long-time Dyson owner or new to the Best Vacuum Cleaner brand, understanding how to maintain your device will extend its lifespan and keep it performing at peak efficiency.
Hidden blockages typically occur in hard-to-see areas of the wand, where hair, dust, and debris accumulate over time. These clogs can reduce suction power by up to 80 percent, making your cleaning sessions less effective. However, with the right approach and a few simple tools, you can restore your vacuum’s performance in minutes. Following proper dyson stick vacuum cleaning instructions ensures you’re maintaining your device correctly and preventing future blockages from forming.
Understanding Where Blockages Hide
The wand of your Dyson vacuum connects the main body to the cleaning head. This long tube seems simple, but blockages can form anywhere along its length. Most commonly, obstructions develop at connection points, bends, or near the entry point where debris first enters. Additionally, the junction between the wand and the cyclone assembly often traps larger items that slip past the cleaning head.
Hair is particularly problematic because it wraps around internal ridges and catches other debris. Pet owners frequently encounter this issue, as animal fur combines with dust to create dense clogs. Moreover, small objects like coins, paper clips, or toy parts can become lodged in narrow sections, creating complete blockages that stop airflow entirely.
Signs Your Dyson Wand Has a Blockage
Recognizing the symptoms of a blocked wand helps you address the problem quickly. The most obvious sign is reduced suction power at the cleaning head. Your vacuum might run normally but fail to pick up debris effectively. Furthermore, you may notice a high-pitched whistling sound, which indicates air is being forced through a restricted passage.
Another telltale sign is the vacuum’s pulsing behavior. Many Dyson models automatically reduce power when they detect a blockage to prevent motor damage. Therefore, if your device keeps starting and stopping, a clog is likely present. Some models also display a blockage indicator light on the body, making diagnosis even easier.
Essential Tools for Clearing Blockages
Before you begin, gather a few basic tools. You’ll need a flashlight to inspect dark areas inside the wand. A long, flexible brush or a straightened wire coat hanger helps dislodge stubborn debris. Additionally, keep a pair of scissors handy for cutting away tangled hair. A bin or large bowl will catch any debris that falls out during cleaning.
Some people find that a simple broom handle works well for pushing blockages through from one end. However, be careful not to use anything too rigid that might scratch or damage the wand’s interior. A soft cloth for wiping down the exterior completes your toolkit.
Step-by-Step Guide to Clearing the Blockage
Start by turning off and unplugging your Dyson vacuum completely. Safety should always come first when performing maintenance. Next, detach the wand from both the main body and the cleaning head by pressing the release buttons. This gives you access to both ends of the tube.
Hold the wand up to a light source and look through it from one end. This simple check often reveals exactly where the blockage sits. Shine your flashlight through the tube to identify any dark spots or obstructions. If you spot something, you’re ready to proceed with removal.
Insert your flexible brush or straightened coat hanger from the end nearest to the blockage. Gently push or twist to break up the clog. Avoid using excessive force, which could damage the wand’s interior surface. Work slowly and methodically, alternating between pushing from both ends if necessary. According to Dyson’s official support guidelines, gentle manipulation is more effective than aggressive pushing.
Once you’ve loosened the debris, tip the wand over your bin and shake it firmly. Most blockages will fall out easily at this point. For stubborn clogs, try tapping the wand gently against your palm while holding it over the bin. This vibration often dislodges resistant debris.
Cleaning Hair-Related Blockages
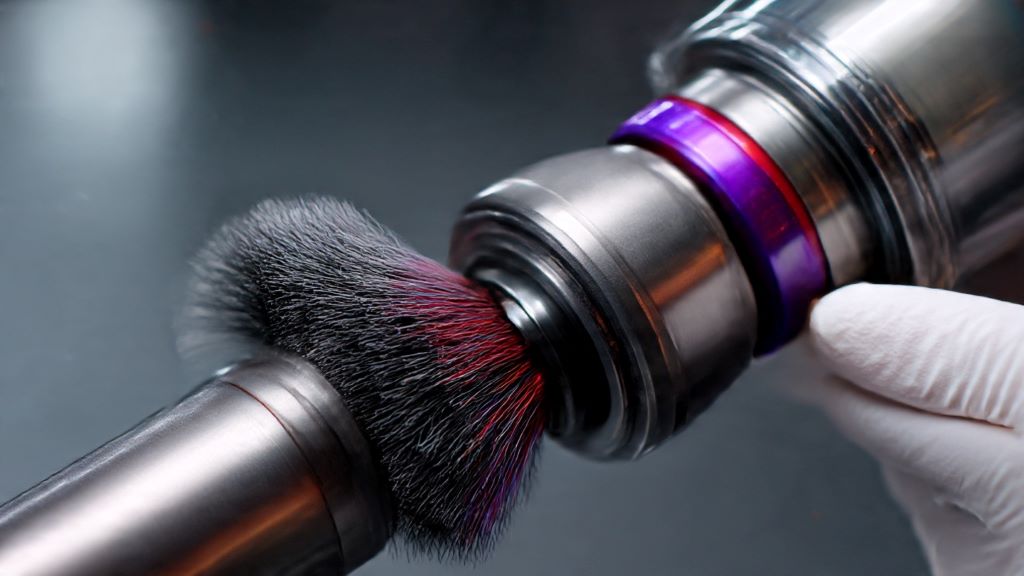
Hair blockages require special attention because they tend to wrap tightly around internal components. If you see hair through the wand, use your scissors to carefully cut through the mass. Insert the scissors into the wand opening and make several cuts through the hair ball. This breaks it into smaller pieces that are easier to remove.
After cutting, use your flexible brush to pull the hair pieces out. Work from both ends of the wand for best results. Additionally, a crochet hook can be incredibly effective for hooking and pulling out hair clumps. Take your time with this process, as rushing often leaves hair behind that will cause future blockages.
Checking Connection Points
Blockages don’t always occur inside the main tube. The connection points where the wand attaches to other components are common trouble spots. Examine the rubber seals and plastic edges at both ends of the wand. Debris often accumulates in these grooves, creating air leaks that reduce suction.
Use your cloth to wipe these areas clean. A cotton swab works well for getting into tight corners. Therefore, regular cleaning of these connection points prevents blockages from forming in the first place. Make this part of your routine maintenance schedule.
Preventing Future Blockages
Prevention is always easier than cure when it comes to vacuum maintenance. Empty your Dyson’s bin regularly, ideally after each use or when it reaches the maximum fill line. A full bin forces debris back into the wand, increasing blockage risk. Furthermore, avoid vacuuming up large items that could become lodged in the tube.
Pick up obvious hazards like coins, rubber bands, or small toys before vacuuming. Additionally, consider using the appropriate attachment for different surfaces. The correct tool reduces the amount of debris entering the wand inappropriately. Consumer Reports suggests that regular vacuum maintenance can double the lifespan of your device.
Inspect your wand monthly for early signs of blockage. This quick check takes only a minute but can prevent complete clogs from forming. Moreover, cleaning your vacuum’s filter regularly ensures optimal airflow throughout the entire system, reducing strain on the wand.
When to Seek Professional Help
Most blockages can be cleared at home with basic tools. However, some situations require professional attention. If you’ve followed all the steps above and still experience reduced suction, the problem might lie elsewhere in the vacuum. Internal motor issues or damaged seals need expert diagnosis.
Additionally, if you’ve accidentally pushed a blockage deeper into the wand or damaged the tube during cleaning attempts, contact Dyson support. They can assess whether repair or replacement is necessary. Never force anything through the wand that doesn’t move easily, as this can cause permanent damage.
Maintaining Overall Vacuum Performance
Clearing wand blockages is just one aspect of proper vacuum care. Regularly wash filters according to your model’s instructions, typically once a month. Allow filters to dry completely before reinstalling them, usually 24 hours. Furthermore, check the brush bar for tangled hair and debris after every few uses.
Keep the bin clean by wiping it out with a damp cloth occasionally. This prevents dust buildup that can affect the bin’s sensors. Therefore, a comprehensive maintenance routine keeps your entire vacuum system working efficiently, not just the wand.
Conclusion
Clearing hidden blockages in your Dyson wand is a simple yet essential maintenance task. By recognizing the signs of a clog early and following the systematic approach outlined above, you can restore your vacuum’s suction power quickly. Remember to gather your tools, work carefully through both ends of the wand, and pay special attention to hair-related blockages. Prevention through regular maintenance and mindful vacuuming habits will minimize future problems. With these techniques, your Dyson will continue delivering the powerful cleaning performance you expect for years to come.
Frequently Asked Questions
How often should I check my Dyson wand for blockages?
Check your Dyson wand monthly as part of regular maintenance, or immediately if you notice reduced suction or unusual sounds. High-traffic households or homes with pets may need more frequent checks, perhaps every two weeks. This proactive approach prevents minor accumulations from becoming major blockages.
Can I use water to clean my Dyson wand?
Yes, you can wash the wand with water if necessary. However, ensure it dries completely before reattaching it to your vacuum. Leave it in a warm, dry place for at least 24 hours. Never use your vacuum with a damp wand, as moisture can damage the motor and electrical components.
What’s the whistling sound coming from my Dyson?
A high-pitched whistling or squealing sound typically indicates air is being forced through a restricted passage, usually due to a blockage. Check your wand, hose, and all connection points. Additionally, ensure the bin isn’t overfull and that all components are properly sealed.
Why does my Dyson keep pulsing on and off?
Pulsing behavior is your Dyson’s protective mechanism against blockages and overheating. The vacuum automatically reduces power to prevent motor damage. This usually means there’s a blockage in the wand, hose, filter, or cleaning head. Clear any obstructions and ensure the filter is clean and dry.
Is it normal for hair to accumulate in the wand?
Yes, hair accumulation is completely normal, especially in households with long-haired residents or pets. Hair naturally gets sucked up during vacuuming and can wrap around internal ridges. Regular checks and removal of hair buildup every few weeks will prevent it from forming dense clogs that block airflow.
Related Topics:
Troubleshooting an AC Leaking Water: A DIY Guide